A Mail deliveries
Order by 4 pm = delivery the next working day.
Free delivery
From CHF 100 purchase
-
MenuBack
-
Online Store
-
-
-
- Couverture
- Temperature control units
- Aids for chocolate
- Chocolate molds
- Praline fillings
- Chocolate ingredients
- Praline hollow body
- Chocolate colors
- Chocolate tattoos
- Chocolate packaging
- Bean to Bar
- Material for cutting chocolates
- Batons with Kirsch
- Airbrush for chocolate
- High Heels Accessories
- Textured films for chocolate
- Chocolate fountain & fondue
-
-
-
-
-
- Cakes Fillings & Ingredients
- Fondant & Marzipan
- Cakes tools
- Cake rings
- Silicone molds
- Decorative mats
- Baking pans for cakes
- Cake stand
- Cakes packaging
- Airbrush for cakes
- Sugar flowers accessories
- Cake Topper & Wedding Figurines
- Cakes dummies
-
-
-
-
-
-
-
-
-
-
-
-
-
-
-
-
-
-
-
-
-
-
-
- Baking chocolate
- Glucose & Sorbitol
- Cocoa beans
- Cocoa nibs
- Monin syrup
- Champagne & Alcohols
- Freeze dried fruits
- Cake & cake glaze
- Flours & baking ingredients
- Chocolate coating & chocolate
- Milk powder
- Granules
- Nuts & Nougat
- Fruit puree
- Creams & Fillings
- Egg yolk & egg white
- Fruit powder
- Special ingredients
- Fondant & Flower Paste
-
-
-
-
-
-
-
- Punching, cutting & embossing
- Mixing bowls & whisks
- Chocolate material
- Thermometer & Burner
- Gloves & Protective Material
- Smoothing & Modeling
- Roll out bar
- Dough scraper & horn
- (Flour) sieves
- Brushes & Tweezers
- Cake turntable
- Spatula & Spatula
- Silicone embossing molds
- Insert strips & cake slices
- Measuring cup
-
-
-
-
-
-
-
-
-
-
-
-
-
-
-
Schablonen & Stencils
-
-
-
-
-
-
-
-
-
-
-
Courses
-
-
- Current courses
- Praline courses
- Chocolate courses
- Chocolate kiss course
- Macaron courses
- Cake courses
- Baking courses
- Patisserie courses
- Ice cream course
- Guetzli, Cookie & Confectionery Courses
- Bread courses
- Pasta courses
- Apéro course
- Cooking courses
- Cupcakes courses
- Éclair course
- Courses in Zurich - Adliswil
- Children's courses
-
-
- Team Events
- Hen Night
- Retail Store
-
About Us
-
-
-
DirectionsDownload relevant PDF now.
-
-
-
Recipes blog
-
-
Recipes Blog
-
-
-
Shipping and Payment
-
- Online Shop
-
- Novelties
- Sale
- Gifts Cards
- Stencils & Stencils
- Chocolate and pralines
- Couverture
- Temperature control units
- Aids for chocolate
- Chocolate molds
- Praline fillings
- Chocolate ingredients
- Praline hollow body
- Chocolate colors
- Chocolate tattoos
- Chocolate packaging
- Bean to Bar
- Material for cutting chocolates
- Batons with Kirsch
- Airbrush for chocolate
- High Heels Accessories
- Textured films for chocolate
- Chocolate fountain & fondue
- Couverture
- Cakes & Pies
- Ice cream
- Bread
- Macarons
- Hearty
- Recipe booklets & books
- Cupcakes
- Dessert
- Cake Pops
- Edible decorations
- Fillings & Ingredients
- Glucose & Sorbitol
- Cocoa beans
- Baking chocolate
- Cocoa nibs
- Monin syrup
- Champagne & Alcohols
- Freeze dried fruits
- Cake & cake glaze
- Milk powder
- Flours & baking ingredients
- Chocolate coating & chocolate
- Granules
- Nuts & Nougat
- Fruit puree
- Creams & Fillings
- Egg yolk & egg white
- Fruit powder
- Special ingredients
- Fondant & Flower Paste
- Food Colors
- Auxiliary means
- Spouts & piping bags
- Fondant, marzipan, flower paste
- Bakeware
- Aprons & Potholders
- Cookie cutters
- Season
- Candles
- Party accessories
- Cocktail
- Cookie & cookie tins
- Tableware
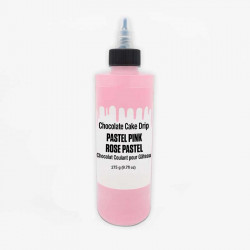
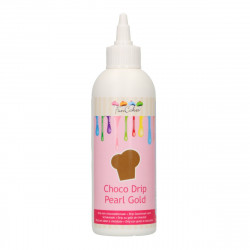
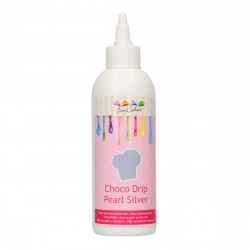
Drip cake icing
There are 11 products.
Active filters
What is a Drip Cake Frosting?
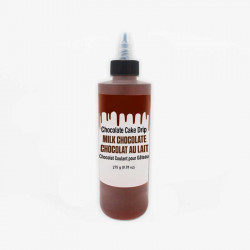
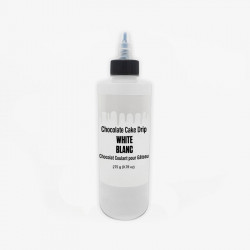
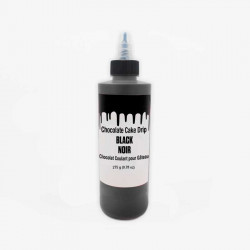
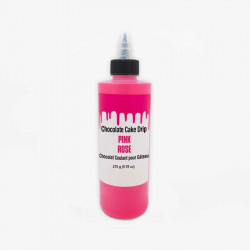
A drip cake icing is a special icing used to create a "drip effect" on a cake. This involves letting the icing drip over the edge of the cake so that it looks like it is dripping down the cake. Often a liquid chocolate icing is used for this, which is made thin by heating. The icing not only provides a decorative effect, but can also enhance the flavor of the cake.
How do I make my own drip cake icing?
To make your own drip cake icing, you will need the following ingredients:
- 200 g chocolate, couverture or candy melts / cake icing (depending on your taste)
- 100 ml cream
- food coloring (as desired)
And here's how:
1. First, chop the chocolate or candy melts and put them in a heatproof bowl.
2. Heat the cream in a small saucepan until it almost boils. Make sure that the cream does not boil over.
3. Pour the hot cream over the chopped chocolate or candy melts and let it stand for a short time.
4. Then, using a whisk or a spoon, melt the chocolate or candy melts in the cream until a smooth and homogeneous mass is formed.
5. If you want, you can now add the desired food coloring and mix well.
6. Let the glaze cool slightly so that it becomes a little thicker. It should still be easy to spread.
7. Now pour the icing around the edge of the cake so that it runs down on its own, creating beautiful drip effects.
8. You can then spread the remaining icing on the cake and add more decorations as desired.
9. Allow the icing to cool completely and set before serving the Drip Cake.
Have fun trying it out!
Advantage and disadvantage of ready-made drip cake icing, which you can buy?
Advantages:
1. Time saving: Buying ready-made drip cake icing saves you the effort of making the icing yourself. This can be especially handy if you are short on time or are not familiar with making icing.
2. Consistent result: Ready-made Drip Cake icing usually provides a consistent result. This means that the icing always flows evenly and has the desired appearance and consistency. This makes it easier to achieve the desired Drip Cake aesthetic.
3. Variety of flavors: Ready-made Drip Cake frosting comes in many different flavors. This allows you to customize your Drip Cake and try different flavor combinations.
Disadvantages:
1. Artificial Ingredients: Ready-made Drip Cake icing may contain artificial ingredients to ensure a long shelf life and consistent result. This is a disadvantage for some people who prefer to use natural ingredients or have specific dietary needs.
2. Limited customization options: When using ready-made Drip Cake frosting, the customization options are limited. You can't control exactly how the icing looks or tastes because it's already pre-made.
3. Cost: Ready-made Drip Cake icing can be more expensive than making your own. However, this depends on the brand and quality of the icing. If you make drip cakes regularly, using ready-made icing could be more expensive in the long run.
For which pastries can I use a drip cake icing?
A drip cake icing is traditionally applied to cakes or cupcakes with a smooth surface. This can be, for example, chocolate cake, vanilla cake, red velvet cake or carrot cake. It is important that the cake has a stable structure and is well cooled before applying the icing.
What is a Drip Cake icing made of?
A typical drip cake icing consists of melted chocolate or candy melts spread on the cake and dripping down the sides to create the "drip effect". The icing can be colored with food coloring to decorate the cake and create different effects. Sometimes frostings based on buttercream or cream cheese are used to frost the cake.
How do I make a Drip Cake cake?
To make a drip cake, you will need the following ingredients and materials:
- An already baked and cooled cake (for example, a sponge cake or chocolate cake)
- Buttercream or other filling of your choice
- A smooth, straight surface on which you can decorate the cake (for example, a cake plate or a turntable). a cake plate or turntable)
- A piping bag or piping bag with a round nozzle for the buttercream
- A frosting for the "drip effect" (for example, melted chocolate, ganache, or royal icing)
- Decorating elements such as sprinkles, fruit, flowers, chocolate bars, etc.
Here is a step-by-step guide on how to make a Drip Cake cake:
1. Cut the already baked and cooled cake horizontally into two or three layers. Fill the cake with buttercream or other filling of your choice. Reassemble the cake.
2. Spread a thin layer of buttercream on the top and sides of the cake to cover evenly. Smooth the surface with a palette or spatula.
3. Fill piping bag or pastry bag with buttercream and pipe ruffles or other decorations on the top of the cake. You can also decorate the sides of the cake with a spiral or pattern of your choice.
4. Melt the icing (e.g. chocolate or ganache) in a water bath or in the microwave. Make sure the icing has a slightly thicker consistency so that it doesn't run off the edge of the cake too quickly.
5. Carefully pour the icing over the edge of the cake so that it flows down naturally and creates the desired "drip" effect. You can also use multiple colors or different kinds of frosting to create different effects.
6. Decorate the cake with sprinkles, fruit, flowers, chocolate bars or other decorations of your choice. Creativity is key here!
7. Allow the icing and decorations to dry and set before serving the cake.
